

Table of Contents:
I Basic Overview of Car Detailing for Novices
II Selecting the Appropriate Detailing Product
III Comprehensive Manual for Exterior Detailing
IV Essential Interior Detailing
VI Bringing Your Headlights Back to Life
VII Maintaining and Caring for Leather
VIII Eliminating Upholstery Stains
XI Understanding Ceramic Coatings
XII Tips for Eco-Friendly Car Detailing
XIII Guide to Seasonal Detailing
XIV Tools and Accessories for Detailing
XV Don’t Neglect the Undercarriage
XVI Debunking Car Detailing Myths
XVII Beyond the Basics
XVIII Sparkle on a Shoestring
Basic Overview of Car Detailing for Novices
For many car owners, their vehicle is more than just a mode of transportation. It’s a source of pride, a reflection of their personality, and a place that holds cherished memories. Just like you wouldn’t neglect your own appearance, giving your car a proper detailing is essential to maintain its condition, value, and head-turning good looks.
Car detailing is a comprehensive process of cleaning, restoring, and enhancing the appearance of a vehicle, both inside and out. It goes beyond a standard car wash and involves meticulous attention to detail to ensure that every inch of the vehicle is thoroughly cleaned and rejuvenated.
Detailing typically involves a combination of techniques, tools, and products designed to address various aspects of a vehicle’s appearance, including its paintwork, interior surfaces, wheels, and glass. The goal of car detailing is to achieve a showroom-quality finish, making the vehicle look as close to new as possible.
The process of car detailing can vary depending on the specific needs of the vehicle and the preferences of the owner or detailer. It often includes steps such as washing and drying the exterior, removing contaminants from the paintwork, polishing and waxing to restore shine and protect the paint, cleaning and conditioning the interior surfaces, and treating other areas such as the wheels, tires, and glass.
Professional detailers may use specialized equipment such as dual-action polishers, steam cleaners, and clay bars to achieve optimal results. They also have access to a wide range of detailing products, including soaps, cleaners, polishes, and protectants, each formulated for specific purposes and surfaces.
Selecting the Appropriate Detailing Products:
Key Considerations for Waxes, Polishes, and Cleaners
Giving your car a good detail is a fantastic way to keep it looking its best and protect the paintwork. But with a vast array of waxes, polishes, and cleaners available, choosing the right products can be daunting. Don’t worry, this guide will break down the key considerations to help you select the perfect detailing products for your car.
Understanding the Difference: Waxes, Polishes, and Cleaners
- Car Cleaners: As the name suggests, car cleaners remove dirt, grime, and contaminants from the paintwork. They come in various forms, including wash solutions, clay bars, and tar removers. Choose a cleaner based on the severity of the dirt you’re tackling.
- Car Polishes: Polishes are used to restore the paint’s shine by removing minor scratches, swirls, and oxidation. They are slightly abrasive and can be categorized as cutting polishes (stronger for deeper imperfections) or finishing polishes (milder for light scratches).
- Car Waxes: Waxes provide a layer of protection on the paint, enhancing gloss and repelling water. They don’t contain abrasives and are applied after polishing to lock in shine and create a hydrophobic layer.
Choosing the Right Products for Your Car’s Needs
- Paint Condition: Assess your car’s paintwork. Is it just dirty or are there visible scratches and swirls? Heavily swirled paint might need a cutting polish, while a cleaner and wax might suffice for a well-maintained car.
- Desired Finish: Do you prioritize long-lasting protection or a high-gloss shine? Some waxes offer both, while others lean more towards one or the other.
- Ease of Use: If you’re a detailing novice, consider using user-friendly products like spray-on waxes or polishes. For experienced detailers, traditional paste waxes and polishes offer more control.
Additional Tips
- Always wash your car thoroughly before applying any polishes or waxes.
- Work in a shaded, well-ventilated area.
- Use microfiber cloths to avoid scratching the paint.
- Test any new product in a small, inconspicuous area first.
By following these tips and understanding the different detailing products available, you can select the perfect combination to keep your car looking showroom-fresh. Remember, a little TLC goes a long way in preserving your car’s paintwork and value.
Comprehensive Manual for Exterior Detailing:
Washing, Claying, Polishing, and Waxing
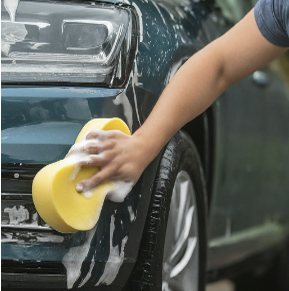
Your car deserves to look its best! Taking the time to properly detail the exterior goes beyond a simple car wash. Exterior detailing is a multi-step process that removes contaminants, enhances paintwork, and protects your vehicle’s finish, leaving it gleaming like new. This guide will walk you through the essential steps of washing, claying, polishing, and waxing for a flawless exterior detail.
Preparation is Key!
- Gather your Supplies: Stock up on car wash soap (preferably a pH-neutral formula), two wash mitts (one for the body and another for the wheels), clay lubricant, clay bar, polishing compound, wax, microfiber towels of varying nap lengths, and tire shine (optional).
Park in the Shade: Avoid direct sunlight, which can cause water to evaporate too quickly and make washing more difficult.
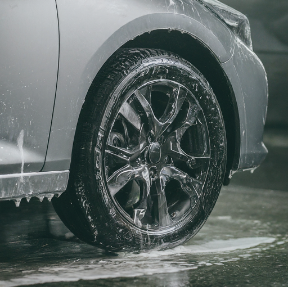
Washing Away the Dirt- Pre-Rinse: Use a strong stream of water to loosen and remove loose dirt and debris. Pay particular attention to the wheels and wheel wells.
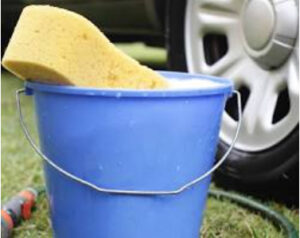
- Two-Bucket Wash: Fill two buckets with water, one for soapy water and another for rinsing your wash mitt. This prevents you from re-contaminating the car with dirty water. Wash the car in sections, starting from the top and working your way down. Rinse thoroughly after washing each section.
- Wheel Well Scrub: Use a dedicated wheel cleaner and a separate wash mitt for the wheels and wheel wells. Brake dust can be stubborn, so use a gentle scrubbing brush for tougher areas.
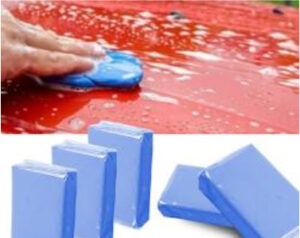
Claying for a Smooth Finish
- Lubricate the Surface: Spray a clay lubricant onto a small area of the car’s paint.
Claying: Gently glide the clay bar back-and-forth across the lubricated surface in a smooth, overlapping motion. The clay will pick up any contaminants stuck on the paint, leaving it feeling smooth and polished. If the clay bar becomes discolored, fold it in half and continue using a clean section
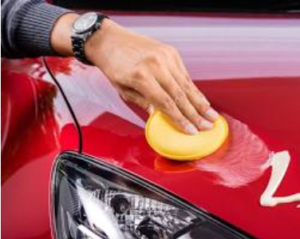
Polishing to Perfection- Apply Polishing Compound: Use a small amount of polishing compound on a microfiber polishing pad. Work the compound in small sections using a back-and-forth motion with moderate pressure. Buff the area clean with a dry microfiber towel to reveal a restored and glossy finish.
Waxing for Protection
- Apply Wax: Apply a thin coat of car wax to the entire car using a clean microfiber applicator pad. Let the wax haze slightly, then buff it off with a clean microfiber polishing towel to reveal a deep shine and a protective layer.
Final Touches- Clean the Windows and Mirrors: Use a dedicated glass cleaner and a microfiber towel to ensure a streak-free finish.
- Dress the Tires (Optional): Apply tire shine to enhance the look of your tires and add a protective layer.
Maintaining Your Shine
Regular car washes and occasional detailing will keep your car looking its best. By following these steps and with a little elbow grease, you can achieve a showroom shine for your car and ensure its paintwork is protected for years to come.
Essential Interior Detailing:
Methods for Cleansing and Safeguarding Your Car’s Inside Space
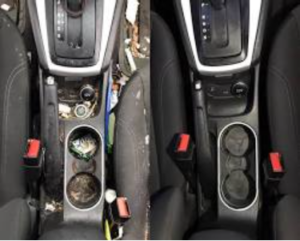
Your car’s interior endures a lot: coffee spills, french fry crumbs, and the general wear-and-tear of daily commutes. Essential interior detailing goes beyond a quick vacuum, reviving your car’s inner space and protecting its value.
The Cleaning Arsenal:
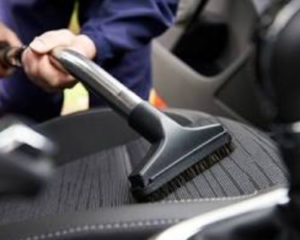
- Vacuum: Your first line of defense, a vacuum with attachments tackles dust, debris, and stubborn pet hair lodged in carpets and seats.
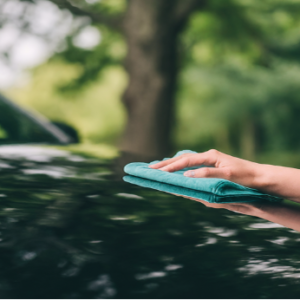
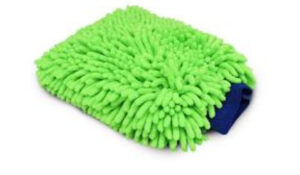
- Microfiber Cloths: These gentle giants avoid scratching surfaces while absorbing dirt and grime. Opt for different microfiber cloths for cleaning and polishing.
- Cleaning Solutions: An all-purpose cleaner handles most surfaces, while specific cleaners target upholstery, leather, and glass.
Conquering the Grime:
- Begin with a Clean Sweep: Remove trash and loose items.
- Vacuum Thoroughly: Hit the seats, carpets, floor mats, and don’t forget crevices and consoles.
- Wipe Down Surfaces: Using microfiber cloths and designated cleaners, tackle the dashboard, door panels, and steering wheel.
- Upholstery Attention: For fabric seats, use an upholstery cleaner following the product instructions. Leather seats require a leather conditioner to maintain suppleness and prevent cracks.
- Don’t Forget the Glass: A streak-free glass cleaner ensures a clear view.
Maintaining the Shine:- Regular Vacuuming: Maintain a clean interior with weekly vacuuming.
- Sun Protection: Park in the shade or use UV protectant wipes on the dashboard to prevent fading.
- Leather Love: Regular conditioning keeps leather supple and prevents cracks.
By following these essential interior detailing methods, you’ll transform your car’s interior into a clean, protected haven for every ride.
Cleaning the Engine Bay:
Implementing Safe Practices for a Vital Area.
The engine bay is the heart of your car, a complex network of parts working together to propel you down the road. Just like your own heart, it needs regular care to function at its best. Keeping the engine bay clean can improve performance, prevent corrosion, and even help you spot potential problems early on.
However, unlike washing the exterior of your car, cleaning the engine bay requires a more cautious approach. Here’s a guide to safely and effectively cleaning your engine bay:
Safety First!

Cool Down the Engine: Never attempt to clean a hot engine. Wait for it to cool completely to avoid burns.
- Protect Yourself: Wear gloves and safety glasses to shield yourself from cleaning chemicals and debris.
Gather Your Tools
You’ll need a few supplies for the job:
- Garden hose with nozzle (or sprayer)
- Engine degreaser
- Soft bristled brushes (various sizes)
- Microfiber towels
- Plastic bags (to cover electrical components)
- Optional: Shop vaccum
Cleaning Process
- Loose Debris Removal: Use a brush or shop vac to remove loose dirt, leaves, and debris.
- Cover Electricals: Use plastic bags to securely cover sensitive electrical components like the alternator, air intake, and fuse box.
- Degrease It: Apply engine degreaser according to the product’s instructions, typically spraying it on dirty areas and letting it sit for a few minutes.
- Scrub and Rinse: Use a soft brush to agitate grime, then carefully rinse the engine bay with a gentle stream of water. Avoid direct spraying of electrical components.
- Dry Thoroughly: Use microfiber towels to dry the engine bay completely. Excess moisture can lead to rust and electrical problems.
- Reassemble and Check: Remove plastic coverings, reconnect the battery terminal (positive terminal first!), and double-check that everything is secure before starting the engine.
Final Thoughts
Cleaning your engine bay can be a rewarding task, giving you a cleaner and potentially more efficient engine. By following these steps and prioritizing safety, you can ensure a successful cleaning session that keeps your car running smoothly.
Remember: If you’re uncomfortable cleaning the engine bay yourself, consult a professional detailer for expert cleaning and peace of mind.
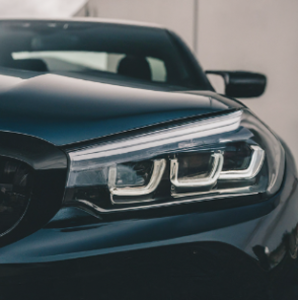
Bringing Your Headlights Back to Life:
A Guide to Restoring Cloudy Headlights
Over time, a car’s headlights can become cloudy or yellowed. This not only looks unsightly, but it can also reduce nighttime visibility, making driving less safe. Luckily, restoring cloudy headlights is a relatively inexpensive and easy process that you can do yourself at home.
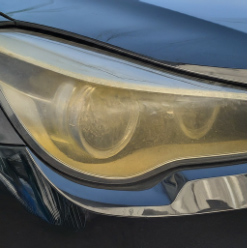
Why Do Headlights Get Cloudy?Headlights are made from a strong polycarbonate plastic that is designed to be resistant to impact. However, this plastic can deteriorate over time due to exposure to sunlight, ultraviolet (UV) rays, and harsh weather conditions. This deterioration causes the plastic to become hazy and less transparent.
Restoring Clarity to Your Headlights
There are two main methods for restoring cloudy headlights:
- Headlight restoration kit: This is the most common and effective method. Headlight restoration kits typically include sanding pads, polishing compound, and a UV sealant. The sanding pads remove the damaged outer layer of the plastic, while the polishing compound restores clarity. The UV sealant helps to protect the headlights from future damage.
- Toothpaste (temporary fix): In a pinch, you can use toothpaste to temporarily restore clarity to your headlights. Toothpaste contains mild abrasives that can help to remove some of the oxidation on the plastic. However, this is not a long-term solution and will need to be repeated periodically.
Steps to Restoring Headlights with a Kit
- Wash and dry the headlights thoroughly.
- Mask off the area around the headlights with painter’s tape to protect your car’s paint.
- Sand the headlights with the sanding pads included in the kit, starting with the coarsest grit and working your way up to the finest.
- Apply the polishing compound with a soft cloth and buff the headlights until they are clear.
- Apply the UV sealant according to the instructions on the kit.
Tips for Success
- Work in a shaded area and out of direct sunlight.
- Wet the sanding pads with water as you use them.
- Don’t apply too much pressure when sanding.
- Be careful not to touch the polished headlights with your bare hands, as this can transfer oils from your skin.
By following these steps, you can easily restore your cloudy headlights and improve your nighttime visibility. With a little effort, you can keep your car looking its best and ensure safe driving conditions.
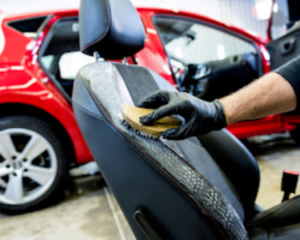
Maintaining and Caring for Leather: Optimal methods for conditioning and cleansing.Leather car seats add a touch of class to any vehicle, but maintaining their supple feel and rich look requires proper care. Here’s a quick guide to get you started:
Cleaning: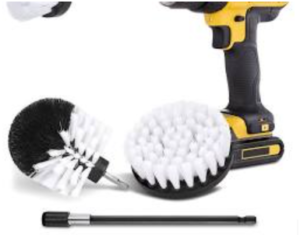
- Park in the shade: Excessive sun exposure can dry out leather and accelerate cracking.
- Gather your tools: You’ll need a vacuum cleaner with a soft brush attachment, a microfiber towel, and a leather cleaner specifically designed for cars (avoid harsh soaps or detergents!).
- Vacuum thoroughly: Remove any loose dirt, crumbs, or dust that can scratch the leather. Pay close attention to seams and perforations.
- Spot clean: Address spills or stains immediately with a damp microfiber towel. Blot, don’t rub, to avoid spreading the stain. Consult your car’s manual or the cleaner’s instructions for tougher stains.
- Clean the entire surface: Apply the leather cleaner to a microfiber towel, not directly to the seat. Work in small sections, gently wiping the leather in a circular motion. Avoid saturating the leather.
- Buff with a dry microfiber towel: This removes any residue and leaves the leather clean.
Conditioning:
- Choose a quality leather conditioner: Look for one that replenishes oils and protects against UV rays and cracking.
- Apply a thin coat: Similar to cleaning, use a microfiber towel to apply the conditioner in small sections.
- Let it absorb: Allow the conditioner to sit for the recommended time (usually 10-15 minutes) according to the product instructions.
- Buff again: Use a clean, dry microfiber towel to remove any excess conditioner and buff the leather to a shine.
Pro-Tips:
- Consult your car’s manual: Different leather types might require specific care instructions.
- Patch test first: Apply a small amount of cleaner and conditioner to an inconspicuous area to ensure no discoloration occurs.
- Frequency: Clean your leather seats every 2-3 months, and condition them every 3-6 months, depending on use and climate.
By following these simple steps, you can keep your leather car seats looking and feeling their best for years to come.
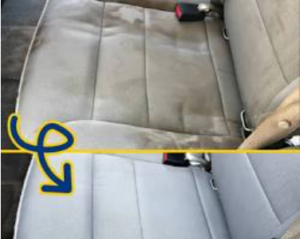
Eliminating Upholstery Stains:
Strategies for Different Types of Stains in Your Car
Spills happen, and when they do, your car’s upholstery can become victim to unsightly stains. But before you resign yourself to a permanent mark, there are steps you can take to banish those blemishes and restore your car’s interior to its former glory. The key lies in identifying the type of stain and using the appropriate cleaning method.Here’s a breakdown of strategies for tackling common car upholstery stains:
- Water Stains:
- Fresh Spills: Blot up as much liquid as possible with a clean, absorbent cloth.
- Dried Water Marks: Mix a solution of equal parts white vinegar and water in a spray bottle. Lightly mist the affected area and blot with a microfiber cloth.
- Coffee & Tea Stains:
- Create a cleaning solution of warm water and a mild dish soap. Dip a microfiber cloth into the solution, wring it out thoroughly, and dab the stain gently.
- For stubborn stains, consider using a commercial upholstery cleaner specifically designed for coffee and tea stains. Always test the cleaner on an inconspicuous area first.
- Food Stains:
- Scrape off any excess food particles with a blunt knife.
- Make a paste of baking soda and water. Apply the paste to the stain and let it sit for 30 minutes. Brush off the dried paste and vacuum the area.
- Grease Stains:
- Blot up as much grease as possible with a clean cloth.
- Sprinkle baking soda on the greasy area and let it sit for several hours to absorb the oil.
- Vacuum up the baking soda and use a commercial upholstery cleaner following the product instructions.
Important Tips:
- Always test any cleaning solution on an inconspicuous area of the upholstery before applying it directly to the stain.
- Work from the outside of the stain towards the center to prevent spreading.
- Avoid using harsh chemicals or abrasive cleaners, as they can damage the upholstery.
- If the stain persists, consult a professional car detailer.
With a little know-how and the right cleaning methods, you can conquer upholstery stains and keep your car’s interior looking like new. By following these simple strategies, you’ll be well on your way to a fresh and stain-free car interior.
Conquering Critter Chaos:
Keeping Your Car Hair and Odor-Free with Your Furry Friend
As much as we adore our furry companions, they can leave behind a trail of hair and odors, especially in our cars. From quick trips to the vet to adventurous outings, pets can easily turn our vehicles into a mess. But fear not! With a few simple strategies, you can keep your car clean and fresh while enjoying the company of your four-legged friends.
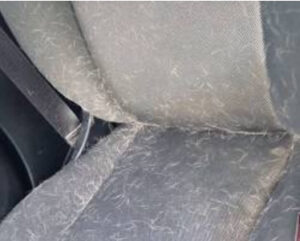

- Invest in Protective Gear: To prevent pet hair from embedding into your car’s upholstery, consider using protective gear such as seat covers, blankets, or pet hammocks. These barriers not only shield your seats but also make cleanup a breeze. Opt for durable, easy-to-clean materials that can withstand muddy paws and shedding fur.
- Regular Grooming: Regular grooming sessions for your pet can significantly reduce the amount of loose hair they leave behind. Brushing your furry friend frequently helps remove excess fur before it finds its way into your car. Additionally, consider scheduling professional grooming appointments to keep shedding to a minimum.
- Vacuum and Lint Roll: Make vacuuming and lint rolling a part of your car maintenance routine. Use a handheld vacuum or a car-specific vacuum cleaner to suction up pet hair from carpets, seats, and crevices. For stubborn hair, a sticky lint roller can be incredibly effective at lifting it off surfaces.
- Air Out Your Car: Combat lingering pet odors by regularly airing out your car. Roll down the windows or use air vents to circulate fresh air throughout the interior. Consider placing odor-absorbing products such as activated charcoal bags or baking soda pouches in your car to neutralize any unpleasant smells.
- Clean Spills Promptly: Accidents happen, but it’s essential to clean up pet messes promptly to prevent stains and odors from setting in. Keep a stash of pet-safe cleaning supplies in your car, including enzyme-based cleaners designed to break down organic stains and odors effectively.
- Establish Boundaries: Set boundaries for your pets in the car to minimize messes. Use pet barriers, crates, or harnesses to confine them to designated areas, preventing them from roaming freely and spreading hair and dirt throughout the vehicle.
By implementing these tips, you can enjoy a clean and fresh-smelling car while traveling with your beloved pets. With a little proactive care and maintenance, you can keep your vehicle pet-friendly without sacrificing cleanliness and comfort
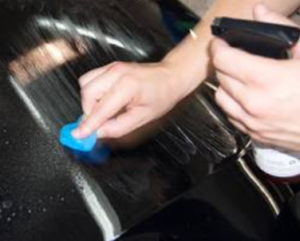
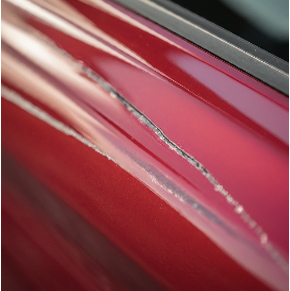
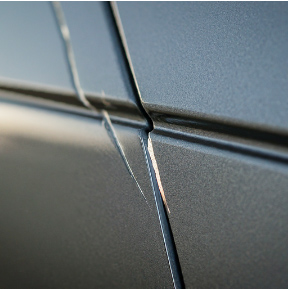
Notice a minor blemish marring your car’s once-pristine paint job? Don’t despair! For shallow scratches that haven’t breached the primer layer, a DIY fix might be within reach. Here’s a breakdown of two easy methods to tackle those touch-up troubles:
Buff Out the Blues:
DIY Paint Scratch Repair for Minor Mishaps

Method 1: Polishing Away the Imperfections
- Gather Your Arsenal: You’ll need car wash soap, a microfiber towel, rubbing compound, and car polish.
- Clean Up the Crime Scene: Wash and dry the scratched area to remove any dirt or debris that could worsen the scratching during polishing.
- Buff It Out: Apply a small amount of rubbing compound to a clean microfiber towel and gently rub in a circular motion, focusing on the scratch. The compound will remove a thin layer of paint, smoothing the scratch.
- Polish for Perfection: Once the scratch appears diminished, apply a car polish to the area using a clean section of the microfiber towel. This polishes the surface and restores shine.
Method 2: Touch-Up Paint for Deeper Scratches
- Identify Your Paint Color: This is crucial for a seamless repair. Check your car’s manual or a sticker inside the driver’s door jamb for the paint code.
- Acquire Touch-Up Paint: Head to an auto parts store with your paint code to get matching touch-up paint, usually available in a small bottle with a brush applicator.
- Clean and Mask: Wash and dry the scratched area. Use masking tape to carefully mask around the scratch to prevent accidental paint application on undamaged areas.
- Apply with Precision: Apply a small amount of touch-up paint within the scratch using the built-in brush. Multiple thin coats are better than one thick coat to avoid bumps. Let each layer dry completely before applying the next.
- Buff and Shine: Once the paint is dry, remove the masking tape and gently buff the area with polishing compound and car polish, following the same steps as Method 1.
Remember:
- These methods work best for shallow scratches. For deeper scratches that reach the primer layer or beyond, consider consulting a professional.
- Always test any product on an inconspicuous area first to ensure compatibility with your car’s paint.
With a little elbow grease and these DIY techniques, you can keep your car’s paint job looking sharp and those minor scratches a distant memory.
Understanding Ceramic Coatings:
Advantages and Application Procedures.

Ever craved a long-lasting shield for your car’s paintwork? Look no further than ceramic coatings! These liquid polymer marvels bond to your car’s exterior, offering a plethora of advantages over traditional waxes and sealants.
Gleaming Benefits of Ceramic Armor:
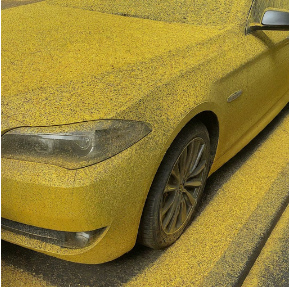
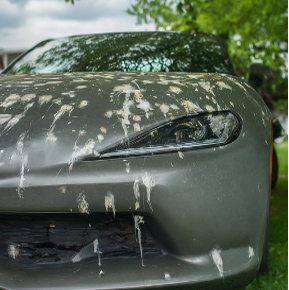
- Superior Protection: Ceramic coatings create a tougher, semi-permanent layer that guards against environmental assaults like UV rays, bird droppings, and minor scratches.
- Hydrophobic Magic: Rain and dirt bead up on the surface, making washing and maintaining a gleaming shine significantly easier.
- Enhanced Aesthetics: Ceramic coatings boost the car’s paint depth and gloss, leaving a showroom-like finish that lasts for years.
- Chemical Resistance: These coatings offer improved resistance to harsh chemicals and road grime, keeping your paint looking fresh for longer.
The Art of Applying Ceramic Armor:
While DIY application kits exist, achieving a flawless ceramic coating is a meticulous process best left to professionals. Here’s a simplified breakdown of the procedure:
- Detailed Preparation: The car undergoes a thorough cleaning and decontamination to remove any impurities that might affect the bonding process.
- Paint Correction (Optional): For an immaculate finish, professionals may recommend paint correction to eliminate existing swirls, scratches, or oxidation.
- Ceramic Coating Application: The ceramic coating is meticulously applied by hand, layer by layer, ensuring even coverage. Curing time is crucial for proper bonding.
- Final Touches: Once cured, the car receives a final polish to reveal the full depth and brilliance of the ceramic coating.
Ceramic coatings are an investment, but their long-lasting protection, superior shine, and ease of maintenance make them a compelling choice for car enthusiasts who desire the ultimate shield for their prized possessions.
Tips for Eco-Friendly Car Detailing
Adopting Sustainable Methods in Auto Care
Keeping your car looking sharp is a point of pride, but traditional detailing practices can leave a hefty environmental footprint. Luckily, eco-friendly detailing options are emerging, allowing you to maintain a gleaming ride without sacrificing sustainability.
Embrace Water Conservation:
- Ditch the Running Hose: A traditional hose can guzzle gallons of water. Opt for a bucket wash or consider a waterless wash product for a significant water-saving alternative.
- Pressure Washing Power: While not completely waterless, pressure washers use significantly less water compared to a hose. Look for eco-friendly pressure washing detergents that require less rinsing.
- Two-Bucket Wash: One bucket holds clean water for rinsing your wash mitt, while the other holds soapy water. This reduces the amount of dirty, soapy water used during the wash.
Eco-Conscious Products are Key:
- Biodegradable is the Buzzword: Look for cleaning products specifically labelled as biodegradable. These products break down naturally, minimizing environmental impact.
- Natural Alternatives: Consider natural cleaning solutions like vinegar and baking soda for tackling light dirt and grime. They’re effective, affordable, and gentle on your car’s finish.
- Microfiber Magic: Microfiber cloths are incredibly absorbent and reuseable, reducing reliance on paper towels. They’re gentle on your car’s paint and help achieve a streak-free shine.
Sustainable Detailing Practices:
- Water Recycling (when possible): If you must use a hose, consider capturing the rinse water in a bucket to use for watering plants.
- Proper Disposal: Don’t pour leftover cleaning products down the drain. Dispose of them responsibly at designated hazardous waste facilities.
- Sustainable Interior Cleaning: For tackling interior messes, use a steam cleaner. Steam is a natural disinfectant that requires minimal cleaning products.
Showcasing your car’s shine and minimizing your environmental impact go hand-in-hand with eco-friendly detailing practices. So, embrace these tips and feel good knowing your sparkling car isn’t achieved at the expense of the planet!
Guide to Seasonal Detailing:
Adapting Your Strategy According to the Season
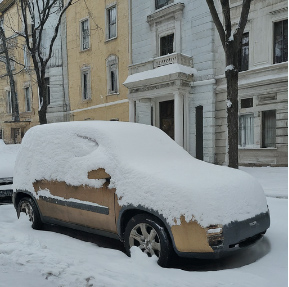
Just like our wardrobes, our car care routines need adjustments throughout the year. From scorching summers to harsh winters, each season throws unique challenges at our beloved vehicles. Here’s how to adapt your detailing strategy to keep your car looking sharp, no matter the weather.
Spring Showers, Sparkling Rides:
- Banishing Winter’s Wrath: Spring is prime time for a deep clean. Remove winter grime, salt residue, and lingering mud with a thorough wash and decontamination process.
- Pollen Patrol: Spring brings blooming flowers, but also pesky pollen. Regularly wash and wax your car to prevent pollen from clinging to the paint and leaving behind a stubborn stain.
- Interior Refresh: After a winter spent battling salt and dirt, your car’s interior deserves some TLC. Shampoo carpets, clean upholstery, and condition leather seats to restore a fresh and inviting feel.
Summer Sun, Sizzling Shine:
- hield the paint from fading and cracking.
- Beat the Heat Haze: Hot summer days can leave behind water spots after a wash. Use a drying towel immediately after rinsing to prevent these unsightly marks.
- Air Conditioning Amnesty: Clean your car’s air conditioning system to remove dust, pollen, and mold buildup. This ensures fresh, cool air and prevents unpleasant odors.
Autumnal Assault: Leaves and Leathery Interiors
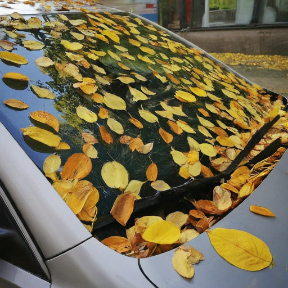
- Leaf Litter Blues: Fall brings falling leaves, which can collect in nooks and crannies. Regularly vacuum your car’s interior to remove leaves and prevent them from accumulating and decomposing.
- Leather Love: With cooler temperatures, leather seats can dry out and crack. Use a leather conditioner specifically designed for automotive use to keep them supple and protected.
- Undercarriage Essentials: Before winter arrives, schedule an undercarriage wash to remove built-up road grime, salt, and debris. This helps prevent rust and corrosion during the harsh winter months.
Winter Wonderland, Woeful Wash Days:
- Wash Wisely: While frequent car washes are ideal, extreme cold can cause water to freeze on the car’s surface. If a wash is necessary, use lukewarm water and a heated garage if possible.
- Salt Solution: Winter roads are often treated with salt, which can corrode your car’s undercarriage. Regularly rinsing the undercarriage helps remove salt buildup and prevent rust.
- Weatherproof Wipers: Replace worn-out wiper blades with winter-specific blades designed to handle snow and ice effectively.
Transitioning to a seasonal detailing approach, you can guarantee your car appears its best all year round, while also providing it with customized protection against the specific challenges that each season brings. This proactive care will not only extend the life of your car but also keep it looking shiny and happy for countless miles to come.
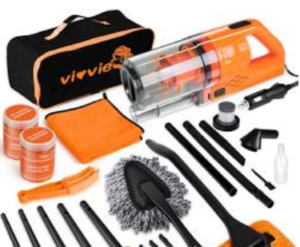
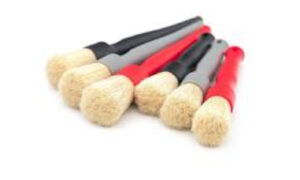
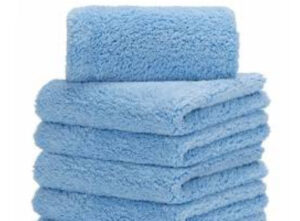
Tools and Accessories for Detailing:
Essential items for every detailer
Transforming a car from drab to fab requires more than just soap and a sponge. Professional detailers wield a specific set of tools to achieve a flawless finish, reaching every crevice for a deep clean. Here’s a quick look at the essentials every detailer should have:
- Powerhouse Cleaning:
Pressure Washer:blasts away dirt and grime.
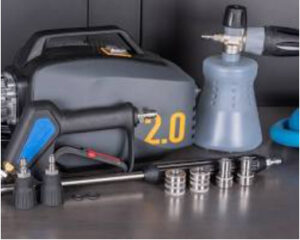
Vacuum Cleaner:tackles dust and pet hair.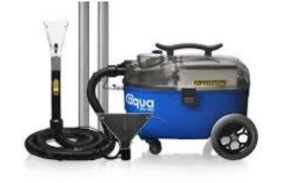
- Brush Brigade:
Microfiber Wash Mitt:gently washes without scratching.
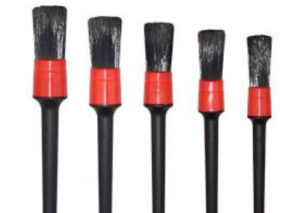
Detailing Brushes:in various sizes reach tight spaces.
Boar’s Hair Brush:cleans leather surfaces.
- Microfiber Marvels:
Microfiber Towels:absorb water and leave a streak-free finish.
- Bucket Brigade:
Wash Buckets (2):separate soapy water and rinsing for a clean wash.
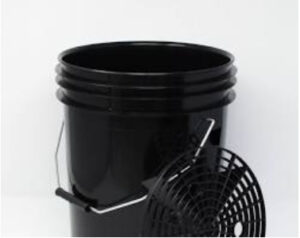
Grit Guard:traps dirt in the wash bucket.

Don’t Neglect the Undercarriage:
Importance and Easy Cleaning Guide
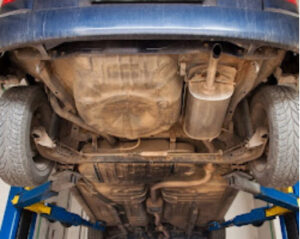
Your car’s undercarriage, often unseen and unloved, plays a vital role in its overall health. Exposed to road grime, salt, and moisture, it’s vulnerable to rust and damage. Regularly cleaning the undercarriage is key to maintaining a healthy car and preventing costly repairs down the road.Why Clean the Undercarriage?
- Prevents Rust: Road salt, moisture, and dirt accelerate rust formation. Cleaning removes these elements, protecting the undercarriage’s metal components.
- Maintains Longevity: A clean undercarriage allows for inspections to identify potential problems early on, like leaks or loose parts, saving you money in the long run.
- Improved Performance: Built-up grime can affect aerodynamics, slightly reducing fuel efficiency.
Cleaning the Undercarriage: A Step-by-Step Guide
Preparation:
- Find a suitable location: Choose a flat, paved surface with drainage. Avoid gravel areas to prevent kicking up stones and damaging the paintwork.
- Park and secure: Engage the parking brake and chock the wheels for safety.
Cleaning:
- Pre-rinse (optional): Use a garden hose to loosen and remove loose dirt and debris.
- Pressure washer:This is the most effective method. Use a wide fan nozzle and maintain a safe distance to avoid damaging components. Focus on areas like wheel wells, control arms, and skid plates.Safety Tip: Never directly spray electrical components or the engine bay.
- Undercarriage cleaner (optional): For stubborn grime, apply a designated undercarriage cleaner according to the manufacturer’s instructions. Let it dwell for a short time to loosen dirt.
- Rinse: Thoroughly rinse the entire undercarriage with clean water.
Final Touches:
- Dry (optional): Let the car air dry or use compressed air to remove excess water from crevices.
- Visual inspection: While underneath, take a quick look for any leaks, loose parts, or signs of damage.
Remember:
- Frequency: Depending on your driving conditions, clean the undercarriage every few months, especially during winter or after heavy rain.
- DIY vs. Professional: While DIY cleaning is effective, professional car washes often have specialized undercarriage cleaning equipment for a more thorough job.
Taking these simple steps will help you keep your car’s undercarriage clean and protected, promoting a longer lifespan and better overall health for your vehicle.
Debunking Car Detailing Myths:
Distinguishing Truth from Fiction
The world of car detailing can be shrouded in a surprising amount of misinformation. From product choices to cleaning techniques, many myths persist. Let’s break down some of the most common misconceptions and set the record straight!
Myth #1: Waxing is all you need for a shiny car.
Reality: Waxing provides a layer of protection and enhances shine, but it’s not a one-stop shop. A complete detail involves cleaning, decontamination (removing bonded contaminants), polishing (removing scratches and swirls), and finally, waxing for protection.
Myth #2: Dish soap is a budget-friendly car wash option.
Reality: Dish soap strips away protective waxes and can dull the paint over time. For car washing, use a dedicated pH-balanced car wash shampoo that cleans gently and preserves the paint’s condition.
Myth #3: Swirls and scratches are inevitable.
Reality: Proper washing techniques and using microfiber cloths significantly reduce the risk of inflicting swirls. Washing in straight lines, not circles, and avoiding dirty wash mitts are key practices.
Myth #4: You only need to detail a car when it looks dirty.
Reality: Regular detailing, even on a seemingly clean car, removes built-up contaminants and maintains the paint’s condition. Think of it as preventative maintenance for your car’s appearance.
Myth #5: More aggressive cleaning is always better.
Reality: Aggressive scrubbing or harsh chemicals can damage the paint. Use the right tools and techniques for the job. For example, claying removes bonded contaminants without scratching, while polishes come in varying levels of abrasiveness depending on the correction needed.
By understanding these myths, you can make informed decisions about your car’s care. Remember, proper detailing goes beyond a quick wash and provides lasting benefits for your car’s appearance and value. So, ditch the misconceptions and embrace the world of proper car detailing!
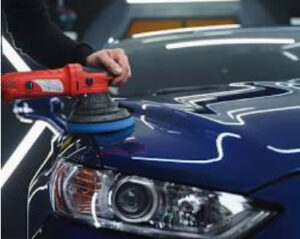
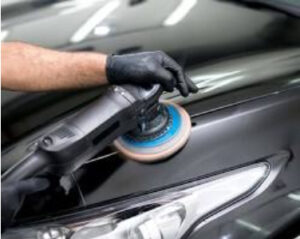
Beyond the Basics:
Advanced Polishing Techniques for a Pro-Level Shine
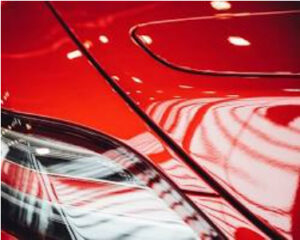
Car with a mirror finish
Achieving a showroom-quality shine requires more than just soap and a sponge. Professional detailers rely on advanced polishing techniques to remove imperfections and reveal a car’s true potential. Here, we delve into some methods that will take your detailing game to the next level.
Multi-Stage Polishing:
This process involves using a series of polishes with varying levels of abrasiveness.
Cutting Compound:Tackles deeper scratches and blemishes.
- Polishing Compound: Refines the finish and removes lighter imperfections.
- Finishing Polish: Creates a high-gloss finish and removes any remaining swirls.
Panel by Panel Approach:
For consistent results, detailers work on the car section by section. This allows for focused attention and prevents overworking any area.
Polishing Pad Selection:
Different polishing pads have varying cutting abilities.
- Cutting Pads: More aggressive for removing deeper defects. (e.g., wool pads)
- Polishing Pads: Medium abrasiveness for refining the finish. (e.g., foam pads)
- Finishing Pads: Softest pads for achieving a high gloss. (e.g., microfiber pads)
The Art of Jeweling:
For an extra touch of brilliance, detailers employ “jeweling.” This involves using ultra-fine polishes and soft pads to achieve a mirror-like shine. It requires meticulous attention to detail and a gentle touch.
Machine Polishing vs. Hand Polishing:
While hand polishing offers more control in tight spaces, machine polishing provides greater efficiency and consistent results on larger areas. Dual-action polishers are a popular choice for detailers as they minimize the risk of burning the paint.
Safety First:
Always wear proper protection like gloves, eye masks, and respirators when using polishing compounds. Ensure adequate ventilation in your workspace.
Professional Help:
For extensive paint correction or if you’re unsure about your skills, consider seeking help from a professional detailer. They possess the expertise and experience to achieve a flawless finish safely.
By mastering these advanced polishing techniques, you can unlock the hidden shine of your car and achieve a professional-looking gloss that will turn heads wherever you go. Remember, patience, precision, and the right tools are key to achieving that coveted showroom finish.
Sparkle on a Shoestring:
Car Detailing Hacks for the Budget-Conscious
Person washing a car with a bucket and sponge
Keeping your car looking sharp doesn’t have to break the bank. Even with limited resources, you can achieve a clean and polished look with a little know-how and some clever substitutions. Here are some budget-friendly detailing tips to get you started:
Washing Wisdom:
- Two Bucket Wash: Use two buckets – one for soapy water and another for rinsing. This prevents re-contaminating the car with dirty water. A simple dishpan can be your second bucket!
- DIY Wash Solution: Skip expensive car washes and create your own wash solution. Mix a few drops of gentle dish soap (not dishwasher detergent) in a bucket of warm water.
- Microfiber Magic: Invest in a couple of microfiber wash mitts and towels. These ultra-soft cloths gently clean and dry the car without scratching the paint.
Interior Refresh:
- DIY All-Purpose Cleaner: For cleaning dashboards and door panels, mix a solution of water and white vinegar (50/50). This is a natural disinfectant and cuts through light grime.
- Vacuum Power: A good vacuuming is essential for removing dust, dirt, and crumbs from the interior. Even a basic home vacuum can do the trick.
- Coffee Filter Finesse: Coffee filters, thanks to their soft texture, are surprisingly effective for cleaning delicate surfaces like instrument clusters and navigation screens.
Shine on a Budget:
- Natural Wax Wonders: Instead of expensive car waxes, consider using furniture polish or even paste wax for a quick shine boost. However, be sure to test on an inconspicuous area first.
- Skip the Clay Bar (for now): Clay bars remove bonded contaminants, but for a budget-friendly alternative, use a microfiber towel with a light polish to remove minor surface imperfections.
Proactive Maintenance:
- Park Smart: Whenever possible, park in shaded areas to minimize sun damage to the paint and interior.
- Regular Washes: Develop a routine of washing your car every two to four weeks, depending on weather conditions. This prevents dirt and grime buildup, making future cleaning easier.
Following these tips and utilizing household items, you can maintain a clean and presentable car without spending a fortune. Remember, consistent care goes a long way, and with a little creativity, you can achieve a budget-friendly shine that will keep your car looking its best.
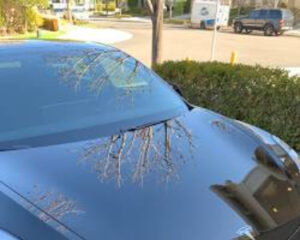
Shine Like New:
Maintaining Your Flawless Detail
Car with a clean and shiny finish
Just achieved a showroom-worthy detail? The hard work doesn’t stop there! Maintaining that professional shine requires a consistent effort, but don’t worry, it doesn’t have to be a chore. Here are some key practices to keep your car looking its best for longer:
Washing Wisely:
- Regular Rinse & Wash: A simple rinse with clean water every other week removes loose dirt and prevents dust buildup. Follow up with a full wash every 2-4 weeks, depending on driving conditions.
- Two-Bucket Wash: Maintain the two-bucket wash method to avoid swirling the paint with dirty water.
- Microfiber Magic: Always use clean microfiber cloths for washing and drying to prevent scratches.
Post-Wash Protection:
- Drying Thoroughly: Water spots can mar the finish. Use a clean microfiber towel to meticulously dry the car after every wash.
- Quick Detailing Spray: Between washes, use a waterless wash or quick detailing spray to remove light dust and fingerprints.
Interior Upkeep:
- Regular Vacuuming: Vacuum the interior at least once a week to remove dust, dirt, and crumbs. Pay attention to carpets, seats, and crevices.
- Wipe Downs: Use a damp microfiber cloth to wipe down the dashboard, door panels, and other surfaces. Avoid harsh chemicals that can damage the interior materials.
Environmental Awareness:
- Park Smart: Whenever possible, park in shaded areas to minimize sun damage to the paint and prevent excessive interior heat buildup.
- Bird Dropping Defense: Address bird droppings immediately. The longer they sit, the more likely they are to etch the paint. Wipe them off gently with a damp microfiber cloth.
Seasonal Savvy:
- Winter Woes: During winter, frequent rinsing removes road salt and grime that can accelerate corrosion.
- Summer Sun: Consider a car cover for extended periods of sun exposure to protect the paint from UV rays.
Incorporating these simple practices into your routine, you’ll extend the lifespan of your detail and keep your car looking its best for months to come. Remember, a little TLC goes a long way in preserving that showroom shine!
In conclusion, maintaining a meticulously detailed car doesn’t require a complete overhaul every week. With a regular washing routine, proper drying techniques, and smart practices to shield your car from the elements, you can extend the longevity of that professional shine. Remember, these simple steps are an investment in your car’s appearance and value. So, with a little effort, you can keep your car turning heads and feeling fresh for months to come!
